Table of Contents
Over the last few decades, we have changed the way we create and distribute content. We’ve seen three big shifts.
The 1980s brought personal computers and content creation was democratized. Educators could now develop and share educational materials on their own. The 2000s brought widespread internet adoption and interactive platforms like LearnWorlds.
Now, in the 2020s, AI is the game-changer. It gives us tools powered by machine learning algorithms, to create high-quality visual content that we could only get from a professional studio. The challenge is to leverage AI’s capabilities and features while keeping human creativity.
Visualize to Educate: Create Visual Content With AI

Understanding visual content creation with AI
Before we show you the LearnWorlds AI prompting framework, let’s explain what we mean by visual content creation and what AI can do for you in this area.
What is visual content creation?
Visual content creation means designing and producing visual elements like images, videos, and graphics to communicate a message, convey information, or tell a story. This includes not only static images but also interactive elements like animations and videos.
In today’s digital age, visual content is the foundation of communication especially on social media. Research shows visuals are processed 60,000 times faster than text helping grab the audience’s attention, simplifying complex information, and creating an emotional connection with the viewer.
Whether it’s an infographic, a video on a landing page, or a social media post, visual content is essential for any marketing strategy.
What is AI-powered visual content creation?
AI-powered visual content creation is a rapidly growing field that uses artificial intelligence to generate amazing visuals. This technology has changed the creative process, allowing marketers and creators to produce high-quality visual content fast and efficient. By using machine learning algorithms to analyze visual data, AI can generate new content that is both innovative and visually stunning.
The applications of AI-powered visual content creation are endless. From crafting social media posts to designing marketing materials, AI can handle it all. Image editing becomes a breeze with AI, you can resize, crop, and adjust brightness and contrast in seconds. This is especially helpful for businesses that need to produce a large volume of visual content without compromising on quality.
In short, AI-powered visual content creation is changing the way we approach design and marketing making it easier than ever to create images that resonate with the audience and elevate the brand.
Benefits of using AI for visual content creation
Artificial intelligence (AI) has changed the visual content creation landscape, providing us with tools and features to speed up the process.
Here are the benefits of using AI for visual content creation:
With these benefits, AI visual content creation can supercharge your marketing, making it easier to create great visuals. As we go into AI in visual content creation, we’ll see how it allows educators to create impactful and engaging learning experiences with minimal resources. AI can help with content generation, making it easier to create educational visuals that inform and captivate students.
LearnWorlds AI prompting framework for visual content creation
Creating visual content with AI requires clarity and precision in communication. Sometimes it starts with just a few words and a well-structured prompt is the key to unlocking AI tools. The 11-step AI Prompting Framework below helps you create prompts for your educational visuals.
Creating an effective prompt with LearnWorlds
Each step can be customized to your needs and the output complexity. Some have a bigger impact than others.
Step 1: Define expertise and role
Example: “Be a graphic designer.”
The models respond well to defined roles. Define the expertise like a photographer or graphic designer to guide the AI.
Step 2: Specify the type of image
Example: “Create a digital illustration.”
Be clear about what you want—whether it’s a photo, sketch, or infographic. This clarity helps the AI to understand the artistic direction. Choose the right image format to match the medium you’ll use for your educational content.
Clear specifications help the AI to contribute to visual storytelling, making the images more impactful and engaging.
Step 3: Define the subject in detail
Example: “Design a full-body female figure doing pilates on a mat.”
Detail is key here. If you want a specific action like a figure doing exercises, describe it thoroughly. A well-defined subject prevents vague or irrelevant outputs and provides a solid foundation for the image content. More detailed descriptions enhance the AI’s image recognition capabilities, resulting in more accurate and relevant outputs.
Step 4: Describe the background
Example: “In a meadow near a pond with soft, diffused lighting.”
Background details are important. Describe where the subject is located and any environmental factors. Specific visual effects can further enhance the background, adding depth and dimension to the image.
Step 5: Decide on the style/artistic genre
Example: “In the style of impressionism, with soft brushstrokes and pastel colors.”
You can ask it to mimic a specific style or artist or skip this if not needed. The style chosen affects the visual feel and interpretation
Step 6: Indicate colors, textures, and moods
Example: “Use turquoise and green tones with a calm, serene mood.”
If you want specific colors, textures, or emotions, include them. This helps convey the intended mood and message.
Step 7: Set camera angle and lighting
Example: “Bird’s-eye view with natural daylight.”
Include camera details like lens type, angle and lighting. Even without technical knowledge, basic directions can enhance the visual impact. This step can turn a static image into a dynamic visual.
Proper visual composition, including camera angle and lighting, can make a big difference to the image.
Step 8: Specify your audience and image purpose
Example: “This image is for a children’s book.”
Specify your audience to get more tailored results, whether educational materials or social media posts. This helps the AI adapt the visual tone and complexity. Understanding visual hierarchy helps in creating images that communicate the message to the target audience.
Step 9: Provide additional input data
Example: “Use this URL as a reference for the style.”
You can upload files or provide URLs as reference. This extra input helps the AI to align with your vision. Providing additional input data ensures visual coherence, making the final output more aligned with your creative vision.
Step 10: Set the output format
Example: “Generate as SVG.”
Specify the output format, like SVG for logos or PNG for course illustrations. Doing so is important for maintaining the quality of the image across different platforms.
Step 11: Iterate
Don’t be afraid to ask for variations. Iteration allows for visual refinement, helping you to get the right balance of elements in your final image. This allows you to explore different options and refine the final product.
From framework to execution: Choosing the right prompting technique
Now that you have the AI Prompting Framework, the next step is to experiment with different techniques to craft your prompts. Depending on your course content and the visuals you need, you can choose between technical or stylistic vocabulary.
Consistency across your prompts ensures a professional look for your visual content.
Let’s go into these two approaches and see some tips and hacks to supercharge your visual content creation.
Using technical vocabulary
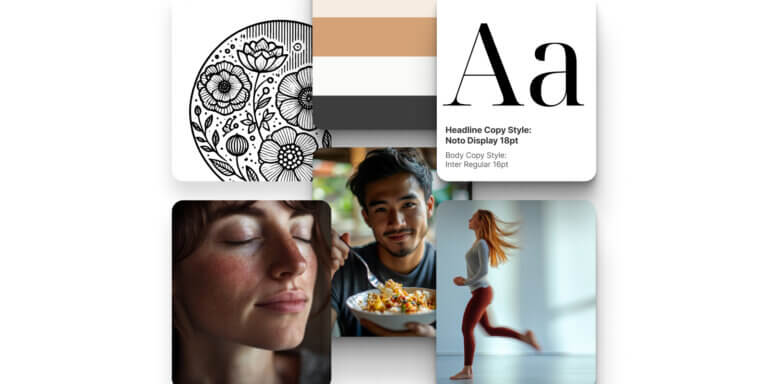
Creating a design system of visual assets with AI for your courses involves generating cohesive visual elements like logos, fonts, colors, and images. Having a visual taxonomy helps in organizing and categorizing your visual assets effectively. This approach uses precise technical vocabulary to instruct the AI and fine-tune the outputs.
Let’s see how to apply this technique, using the example of a mindfulness school named “360 Mindfulness”.
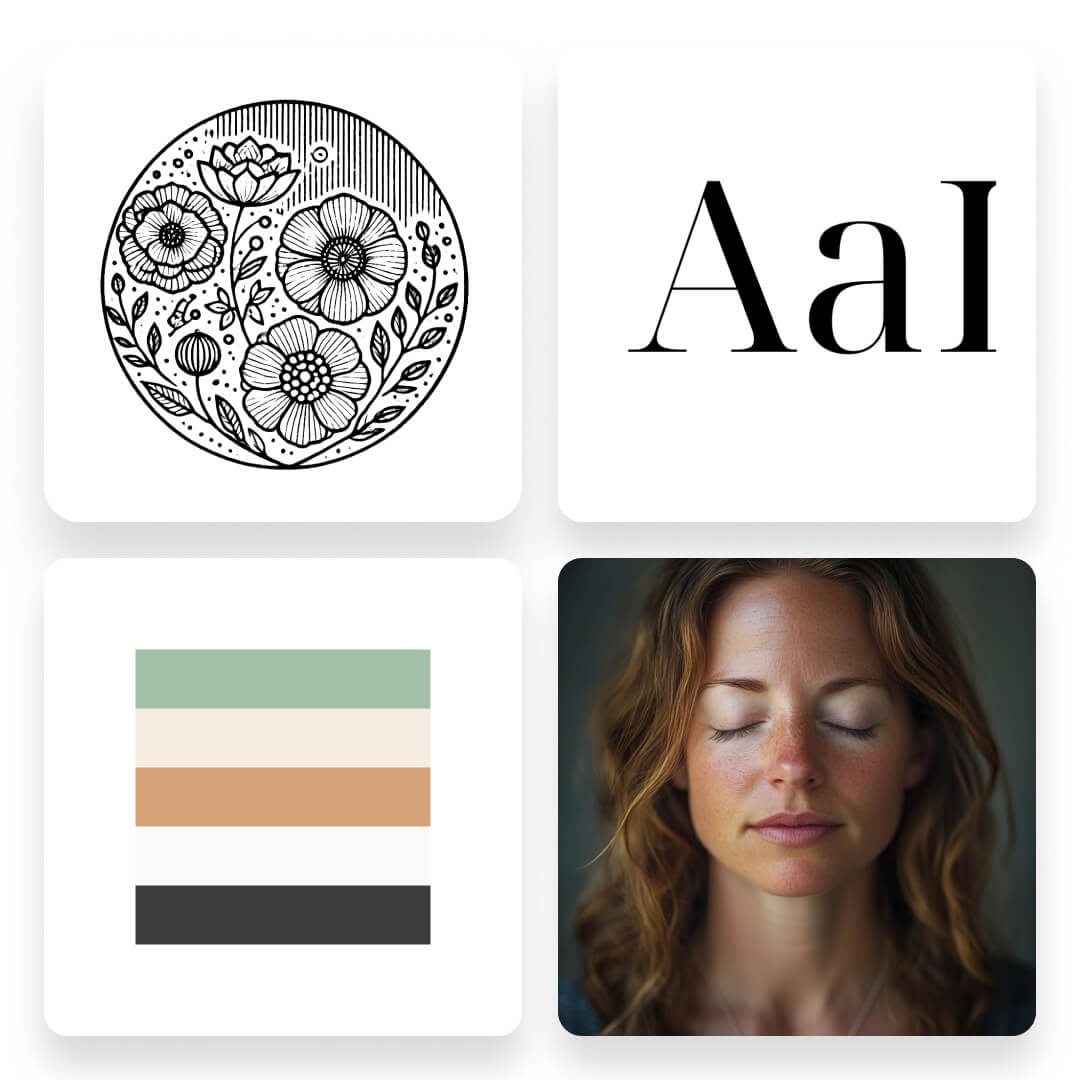
1. Logo design
Start by defining the specifics of your logo. A well-defined visual identify is key to creating a logo that represents your brand. For our 360 Mindfulness school log example, we ould ask for flowers in the logo as 360 represents something circular and flowers are generally circular.
We could also ask for the logo to be in Bohemian style and in SVG format that can be further customized in other design software.
Here is a prompt example you can modify and the generated output:
Be a graphic designer and create a logo for a mindfulness school. The logo should have flowers. The style should be Bohemian. Export as an SVG file.
💡 Tip: It often takes multiple iterations to get the desired result. Be prepared to regenerate the prompt several times, tweaking the details until the AI produces a logo that meets your expectations.
2. Font selection
Choosing the right font sets the tone for your design. The visual tone set by the font can make a big difference to the design. We could ask AI to suggest a “serif font” that is available in Google fonts and suitable for a mindfulness school.
Here is a prompt example and the respective output:
Be a graphic designer and suggest a serif font for a Mindfulness school.
💡 Tip: Always specify if you need a font that is freely available or compatible with specific platforms like Google Fonts to streamline the integration process.
3. Color palette
The school’s website color scheme is important for creating a professional brand identity. Having a curated color palette enhances the overall look of your brand. For the “360 Mindfulness School,” the color palette could be calming and neutral colors reflecting the peaceful environment of mindfulness practice. This prompt generated a curated HEX code color palette:
Be a graphic designer and suggest 5 colors for a Mindfulness school. Colors should be in HEX codes.
💡 Tip: If you have a brand theme in mind, include keywords that represent your brand theme in your prompt to get more targeted suggestions.
4. Image creation
Image creation involves detailed technical prompts that are very specific, detailing the subject, composition, camera settings, and visual data. Including visual metadata, such as camera settings and composition details, helps the AI to produce high-quality images that match the mindfulness school aesthetic.
Here is a prompt that generated the following result: Create an image for a mindfulness school, a woman breathing peacefully, close-up head and shoulders, camera type — Lens 24mm f/8, 1/10 sec shutter — motion blur, slower shutter speed.
💡 Tip: If you’re not sure about the specific camera settings to achieve a certain effect, use resources like Unsplash or Flickr. These platforms provide metadata for each photo, including lens type, aperture, and shutter speed. By referencing these details you can replicate visual styles you like in your AI prompts.
Here we provide you with a set of ready-to-use camera setting prompts:
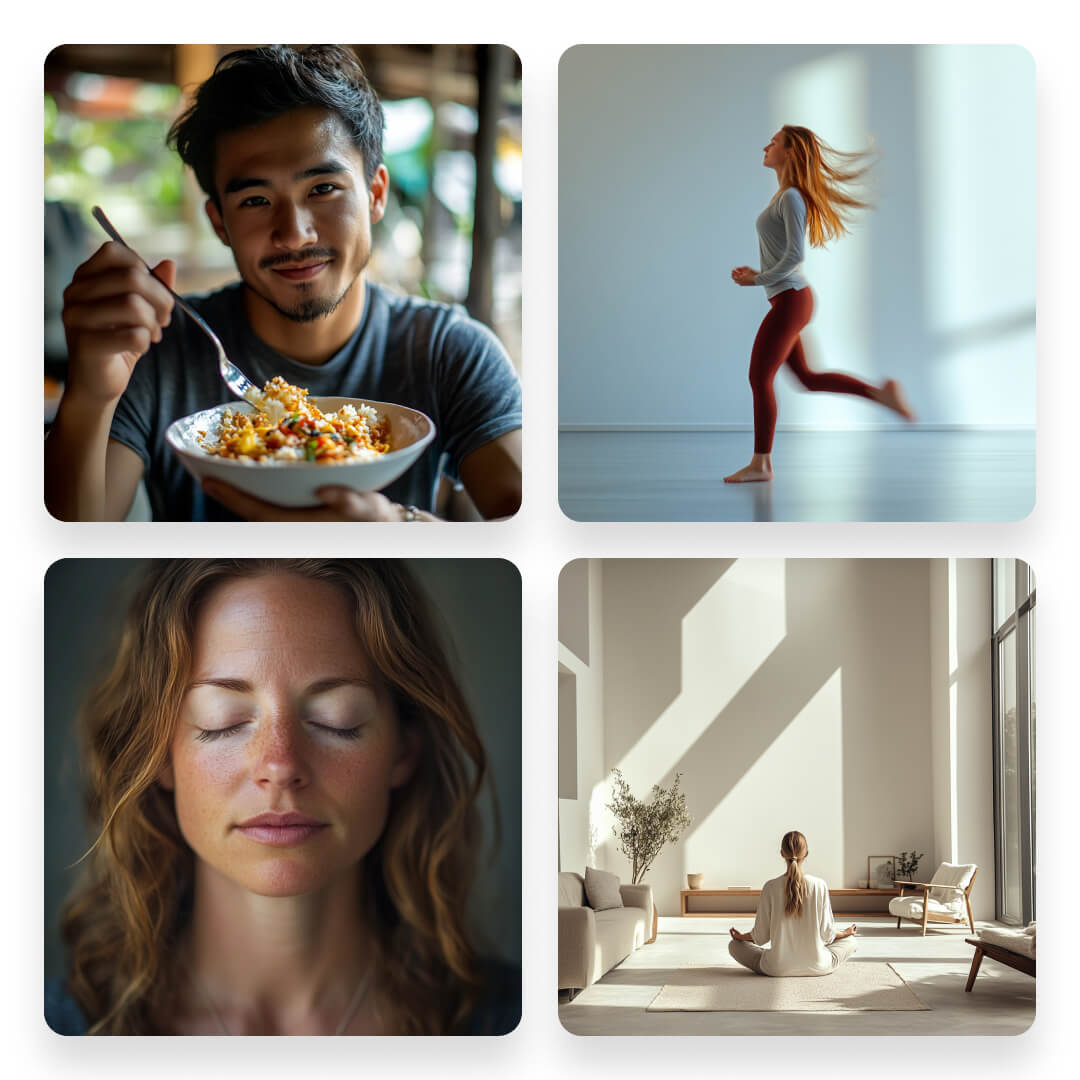
Generating multiple images from one style
Once you have a technical prompt with precise camera settings, creating a series of images is easy. Creating a visual series with the same style and settings ensures a cohesive look across different images. By keeping the same style and settings you can generate images for different contexts in your courses.
This consistency will make your materials look professional and tie together the different elements of your course.
For example, using the same prompt and every time adding a different description of the subject of the image, we created multiple visuals that match the content theme of the Mindfulness School.
Here’s how you can use this technique to create images for various courses of the Mindfulness school:
”Be a photographer and create images for a Mindfulness website. [Enter subject description]. Use a lens 24mm f/8, 1/10 sec shutter—motion blur, slower shutter speed. Produce the image at a 1:1 aspect ratio.”
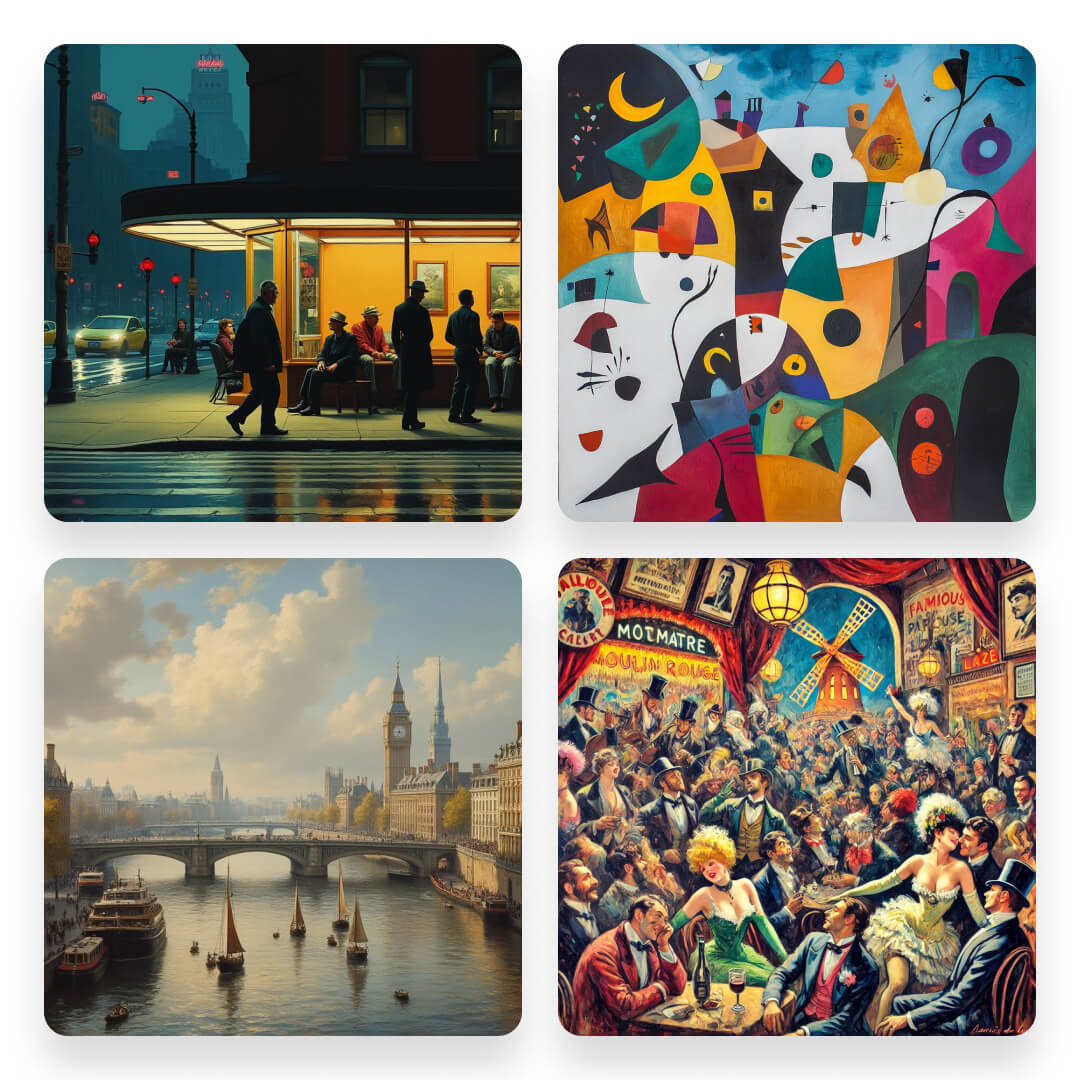
This method focuses on artistic styles and emotional tones to create images that evoke specific moods and feelings. For a travel-themed course, you can use different styles to show iconic cities in a unique way, capturing their essence and vibe.
Let’s see how to use stylistic vocabulary by creating images for a fictional traveling school, showing cities like Paris, New York, Madrid, and Amsterdam with different artistic flair.
Using stylistic vocabulary
The stylistic vocabulary allows you to create visually appealing images that capture the essence of your subject with an artistic twist. A strong visual narrative can turn a simple image into a compelling story that resonates with viewers. By specifying an art style or an artist you can turn a simple prompt into a rich and culturally relevant image.
This is especially powerful when creating images for themes like travel where capturing the unique atmosphere of different cities can scale your content.
1. Using style as the key prompt for image generation
In this approach, the focus is on selecting a specific artistic style to show a city. By doing so you can evoke the culture and aesthetic of that location. Incorporating elements of visual culture can enhance the relevance and impact of your images.
For example, when generating images for a travel guide website you can tell the AI to create images of various cities in the style of famous artists.
Here is a prompt example that can be adjusted to different cities and artistic styles:
“Be a graphic designer and create an image for a [travel guide website]. The image should show [enter city name]. The style should be [enter style].”
By changing the city and artist you can generate a series of images that not only represent each location but also connect with the viewer on a deeper level.
Here are some generated results:
2. Generating multiple images from one style
Once you have a style that fits your content you can use it across different images to create a consistent visual theme. This is especially useful when you need to generate images for multiple locations within a single city or topic, so each image contributes to the same story.
Let’s take New York in the Style of Edward Hopper as an example.
Using the style of Edward Hopper you can depict various New York landmarks in the same way. This is perfect for a travel guide where each image needs to feel part of the same visual story.
Now, let’s see a prompt that can be adjusted to different locations following a particular artistic style and the generated results that help us tell a complete visual story:
“Be a graphic designer and create an image for a [travel guide website]. The image should show a [enter location]. The style should be [in the style of Edward Hopper].”
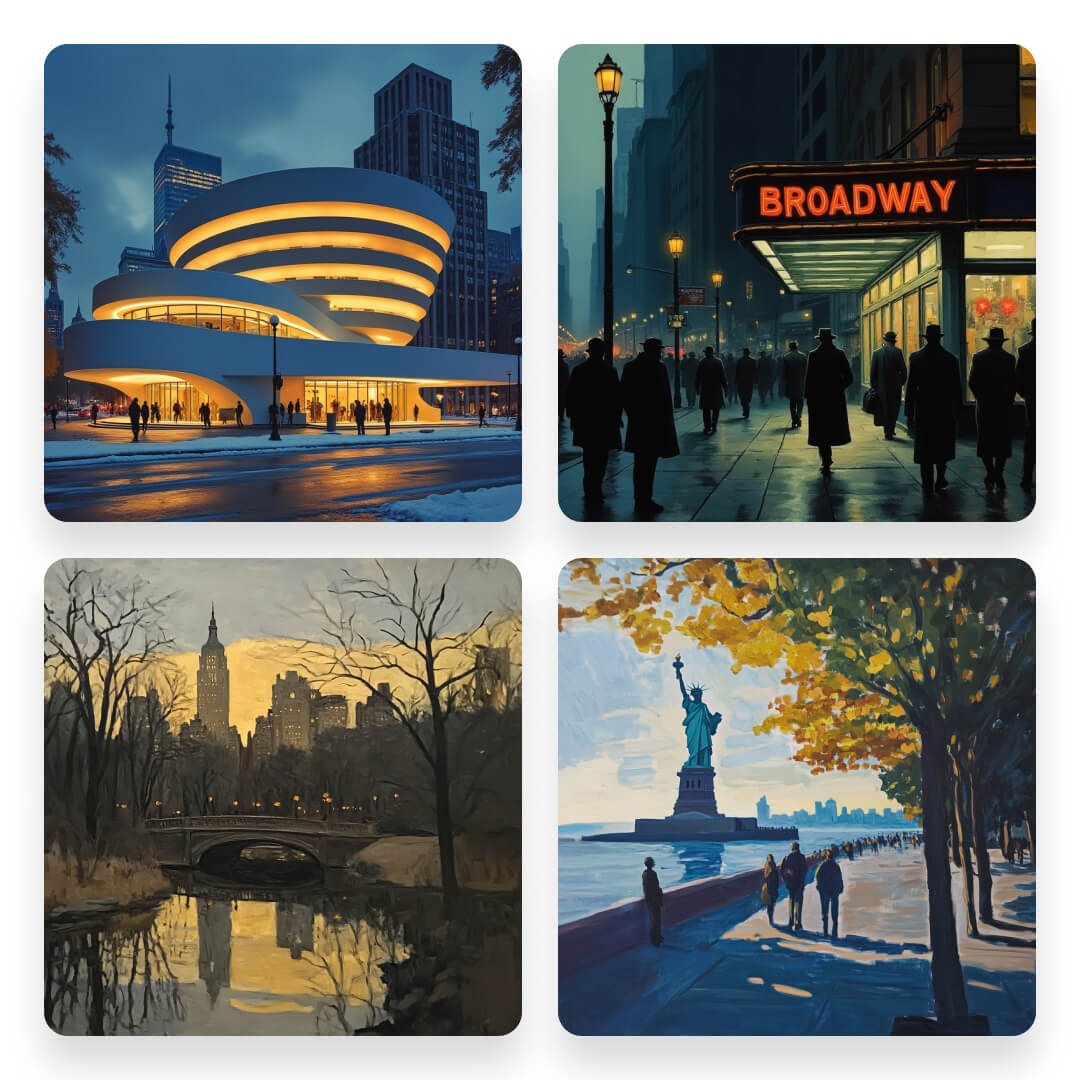
💡 Tip: You can even extend the style by modifying the prompts slightly to include different times of the day or weather conditions, such as:
AI-powered visual content applications
AI-powered visual content has many applications, making it a valuable tool for modern educators and marketers. From lessons and social media posts to marketing materials, AI can handle it all.
For social media platforms like Facebook, Instagram, and X (Twitter), AI-powered tools can create stunning visuals that grab attention and drive engagement. In marketing, AI can create brochures, flyers, and posters that stand out. Image editing tasks like resizing, cropping, and adjusting brightness and contrast are also simplified with AI.
Moreover, AI-powered visual content can be used to create interactive elements like videos and animations, adding a dynamic touch to your marketing efforts. By using AI, businesses can produce high-quality visual content that resonates with their audience and boosts their brand presence.
Creating social media posts with stunning visuals is one of the most powerful uses of AI-powered visual content. AI tools can help you design social media posts that are not only beautiful but also optimized for specific platforms.
AI-powered visual content can be tailored to specific audiences as well, taking into account demographics, interests, and behaviors. This means your social media posts will be engaging and relevant, driving more likes, comments and shares.
By using AI to create social media posts you can streamline your content creation and produce eye-catching visuals that grab your audience’s attention. Whether you want to inform, entertain or inspire, AI-powered tools can help you achieve your goals with ease.
Getting started with AI-powered visual content creation
Choosing the right AI tool for visual content creation can be overwhelming with so many options out there.
Here are the key things to consider to make sure you pick the best tool for you:
By understanding the benefits of AI-powered visual content and choosing the right tool you can unlock the full potential of visual content and take your content creation and marketing to the next level. Whether you’re creating images, videos or graphics the right AI tool can help you produce high-quality visuals that resonate with your audience.
Final thoughts
Choosing the right AI model for your needs is key to creating great visuals for your online courses. Here’s a quick recap of the models we covered:
Each AI has its own strengths and learning curve, so try out multiple tools to see what works for you.
Need logo designs or detailed illustrations? There’s a model for that. Start with a few test prompts and refine as you get more comfortable with each tool.
Once you have your visual assets you can add them to your courses in LearnWorlds. Whether you’re building a course page, an ebook, or even sending emails you can upload logos, fonts, color palettes and images directly into your online school.
With LearnWorlds you have the platform to bring all this together and deliver a seamless learning experience. Try it out for free today!
Further reading you might find interesting:

Mark Bradley
Mark is a seasoned Creative Director at LearnWorlds, bringing over two decades of experience leading innovative design projects and branding. With a background in visual design and a passion for education, Mark has successfully overseen engaging educational content and interactive user experiences. His expertise spans graphic design, multimedia production, environmental design, design systems, and team leadership.

Panagiota is an Instructional Technologies Specialist at LearnWorlds, holding a Ph.D. in Technology Enhanced Learning. Her research focuses on the integration of educational technologies into learning and instruction. In her spare time, she enjoys gardening and staying connected with nature.
Related Articles